Thanksgiving kind of snuck up on me this year. I’ve been anticipating it since early October but I’m still shocked it’s actually next week! I’m even more shocked because I have nothing planned yet, which is SO not me. By now, my mom and I usually already have our game plan down, with only last minute things on the grocery list. We don’t even have a turkey yet! What makes it worse is that I’m already getting ready for Christmas, which totally goes against the traditionalist in me that doesn’t skip over holidays. I don’t know, but the holidays so far have thrown me for a loop.
Besides the fact I have nothing planned, I at least have a quick and awesome dessert option for you semi-traditionalists. This isn’t your traditional apple pie, but is delicious in its own right.
Part of what attracted me to making a galette, aside from it being an apple dessert, is its simplicity. If you can make pie crust, you can make this galette. Even if you can’t make pie crust, you can still make this galette. No fancy equipment is needed to make this, which is awesome, and is super quick to put together.
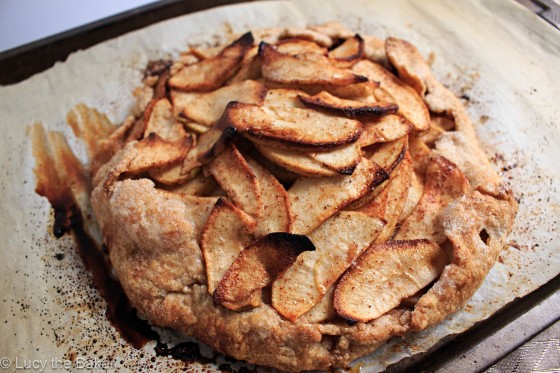
The other thing that attracted me to this galette? The fact that it’s free form. I don’t yet own a pie dish (gasp!). It’s true, I don’t have one. I’ve mentioned it before but we’re just not pie people. No matter how hard I try to get my folks to appreciate pie, it just won’t happen. I guess that’s just one of those American things that’ll never stick at the table at my house. Sad because pie is awesome but there’s not much I can do there. The only thing I own relatively close to a pie pan is a tart pan. The issue there is that it’s pretty big, which is hard to use when most pies and tarts are usually 9 inches in diameter. This is where the galette saves the day. After making the crust, you just roll it out as far as you can, place it on a lined baking sheet, pile the apples on top and fold up the edges. That’s it! No matter how ugly you think it looks, it will come out beautiful and rustic looking. I love it when desserts aren’t intentionally pretty; makes the homemade factor look even more appealing.
Speaking of the crust, it’s super easy to make. No food processor required at all. Sure, it’s handy but you can easily make this crust without it. To cut in the butter, you can either use a dough cutter, a pair of forks, or your hands. I opted for my hands but any of the above works fine. I also subbed half the flour with whole wheat for some nuttiness and pseudo healthiness.
Now, let’s talk about the apples for a minute. For this galette, your apples need to be thinly sliced. You don’t need fancy equipment to make this happen but if you want all slices to be even, break out your mandoline (or handoline, like we did last week) for slicing. I freehanded the slicing this time, because I don’t think evenness is necessary here. You can also artistically lay the slices onto the crust to make it look even fancier, but I just piled them in.
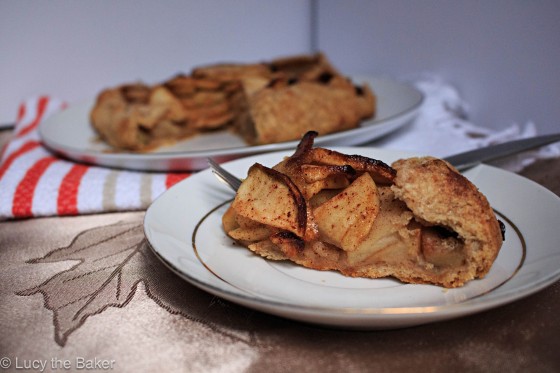
The result is this lovely and rustic dessert that didn’t take too much time or effort to make. The crust is nutty and crunchy against the soft and tart apples. A dessert this simple is perfect for your Thanksgiving table. Not much thought or effort goes into it, and it looks super pretty and like you spent a ton of time on it. No one has to know it was that easy 😉
- Dough:
- 1/2 cup all-purpose flour
- 1/2 cup whole wheat flour
- 1 teaspoon sugar
- 1/8 teaspoon salt
- 6 tablespoons unsalted butter, just softened, cut in 1/2-inch pieces
- 3 1/2 tablespoons chilled water
- Filling:
- 2 pounds apples (I used Granny Smith), peeled, cored (save peels and cores), and sliced
- 2 tablespoons unsalted butter, melted
- 6 tablespoons sugar
- 2 teaspoons ground cinnamon
- Glaze:
- 1/2 cup (100 grams) sugar
- Cores and peels from sliced apples
- In a large bowl, add flour, sugar, salt, and 2 tablespoons of the butter. Blend in a mixer, using a dough cutter, with forks, or your hands until dough resembles coarse cornmeal. Add remaining butter and mix until biggest pieces look like large peas.
- Drizzle in the water, stir, then drizzle in more until dough just holds together. Toss with hands, letting it fall through fingers, until it’s ropy with some dry patches. If dry patches predominate, add another tablespoon water. Keep tossing until you can roll dough into a ball. Flatten into a 4-inch-thick disk and refrigerate for at least 30 minutes.
- Remove the dough from the fridge and let sit out for a couple of minutes, until the dough is malleable but still cold. On a lightly floured surface, roll into a 14-inch circle about 1/8 inch thick. Dust excess flour from both sides with a dry pastry brush.
- Place the dough on a parchment-lined baking sheet. Heat oven to 400°F. Toss sliced apples with 4 tablespoons of sugar and the cinnamon.
- Place the apples on dough, either rustically or in a ring 2 inches from edge; continuing inward until you reach the center. Fold over the dough edges back onto itself, at about one inch intervals until the galette is ‘closed.’
- Brush melted butter over apples and onto dough edge. Sprinkle 2 tablespoons sugar over dough edge.
- Bake in center of oven until apples are soft, with browned edges, and crust has caramelized to a dark golden brown, about 45 minutes, making sure to rotate galette every 15 minutes.
- For the glaze: Put reserved peels and cores in a large saucepan, along with sugar. Pour in just enough water to cover and simmer for 25 minutes. Strain syrup through cheesecloth or sieve.
- Remove tart from oven, and slide off parchment onto cooling rack. Let cool at least 15 minutes before glazing, slicing, and serving.
Apple Galette adapted from Smitten Kitchen


